With the rise in popularity of image based content (thanks to sites like Pinterest, Instagram and Facebook) it’s more important than ever to have a stellar images (at least one) in your blog post. A lot of bloggers will just go to google, search for something, download it and use it on their blog… problem is: that can get you in big trouble. Seriously… google that and see what people have gone through.
Don’t worry though…
There’s an easy way to create your own image, and tons of places (53 in fact) where you can grab royalty free images you can use freely on your blog and not have to worry about any negative consequences.
Let’s start with creating your own images…
People like to pin things these days… and images with words on them do really well on Pinterest. It helps people know exactly what they’re going to get when they click through… it makes it worth it to them to actually click.
I used to do all my images with picmonkey. They have tons of great fonts, and backgrounds and you can make incredible images there, from scratch or starting with an image you’ve taken. However… I recently found something that makes it EVEN easier, and a whole lot more fun.
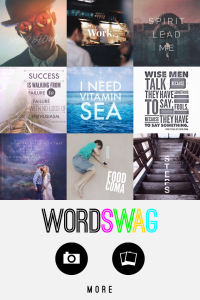
It’s an app… for my phone. It’s called wordswag.
It’s so simple
7 Steps to Amazing Blog Post Images
The app will cost you a couple bucks, and it’s totally worth it! If you’re using instagram for any of your marketing you’re going to want it anyway. Let’s go through how fun and easy this is!
1. Open the app.
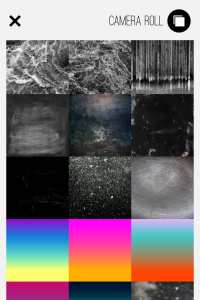
2. Choose background or image ~ you can use one of their backgrounds or you can choose from any image on your phone. (you could even find an image on one of the sites I’ll mention at the end of this post and save it to your phone to use in wordswag!) Update: This app is now connected to Pixabay (a free image site) which means you also have access to all of their images, right from the app!
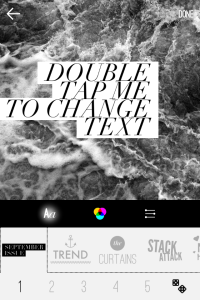
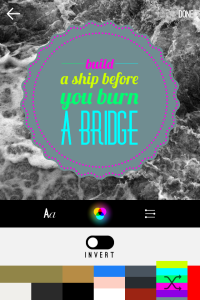
3. Go to the text… write your own text click save. (They also provide snappy sayings and quotes you can use to create motivational images to share on social media!).
4. Choose the font/look of the text. Click through the different fonts at the bottom and see which one you like! You can click the numbers beneath the options to get different looks and feels within that font type. You can also hit the dice to roll the dice and keep changing it until you come up with something you like!
5. Choose the color you want for your font. You can go back and forth between color and font to find something that works well and stands out.
6. Save the image. Once you’ve put together an image and text you like save it! You can email it to yourself right from the app if you’re working from your computer. I have the images from my phone synced to dropbox so it automatically gets uploaded and saved there and I can grab it from my computer (or any other device), so I just save it to my photo roll. I’m sure there are many other options for getting the image where you need it but this has been the best way for me.
7. Upload image to your blog post! Simple as that.
It’s a few steps but it’s so fun to see what comes up and create something gorgeous that it is totally worth it. I love how you can totally change the look and feel of an image with one little click, and then get different versions of it by just clicking the numbers or the dice.
I’m sure once you play around you’ll get as addicted as I am and have as much fun too!
Now, if you don’t want to add all the extra wonderfulness that Wordswag provides, or you want an awesome background image here are 53 places you can find royalty free images for your blog.
Have fun making images for your blog posts… it will help your readers stay engaged and give you infinitely more ways to promote your blog post to more people!











Sometime if things eaiser to get more free time do it