This week for some reason I spy has just kept coming up and up and up. I’ve seen multiple posts on how to make I Spy bottles, and how to dye rice.
Finally after reading this tutorial from Counting Coconuts, I had to give it a try. This project took us a couple days. We dyed the rice one day (and went hunting for cool things to put in our bottles) and we put them together (after spending a bunch of time organizing our beads ~ maybe one day her organizational skills will rub off on me!) on the second day.
How to make an I Spy Bottle
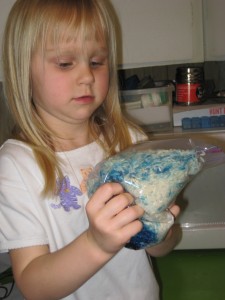 1. Start by dying your rice. All it takes is a ziptop bag, a tbsp of rubbing alcohol and many drops of food coloring. We used about 15 drops (with Hanna doing it, it was hard to count as some of the drops were squirts), but more is better in this instance. Just add the alcohol and coloring to the bottom of a bag.
2. Add the rice (we used about a cup and a half) to the bag and smoosh.
3. When all the rice is colored, lay it out on a paper towel covered baking pan . Using the alcohol the rice dries really quickly. I was pretty surprised!
4. Find some clean containers you want to use for your bottles. We have some single serving juicy juice bottles which were absolutely perfect. I peeled the labels (and saved them, they count for box tops for school) and washed them out. Set them in the dish rack to dry.
5. Find some trinkets to add to your I Spy bottle. We had a tough time finding cute things. We finally went to Michael’s and found some beads/charms that were in the shape of ocean things. (Which worked really well with our blue rice). We also got a nice package of letter charm/beads (that are just the letters, not squares) which we did with some green rice we made. You could also use some cute flat back buttons to create a nice themed bottle.
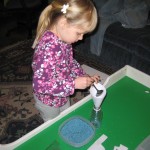 6. Make sure your container is perfectly dry. I dried mine out with the hair dryer for a bit since it had a lot of ridges. Fill your container about 2/3 of the way with rice. You want to leave enough room for the rice to move around so the shapes can reveal themselves.
7. Add your shapes and put the top on. Shake it around to mix in the shapes.
8. Glue your top on (whether you use hot glue or some kind of contact cement, make sure it’s glued so it can’t come off and spill rice everywhere… that would be a mess).
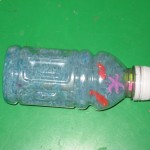
9. Take a picture of the items you’ve added to the jar. You can print it out on a piece of card stock and then laminate it. You can punch a hole through the corner and tie it to the jar. That way people can keep track of what they’ve found so far.
That’s it! You’re done. Now you have a great I Spy bottle to play with. These are great to take in the car. Hanna’s thinking of having a “mermaid” party for her birthday this year. These ocean themed I Spy bottles would also make an excellent party favor! Be forewarned they are a little bit addictive, you may not be able to stop at just one. 🙂
I Spy bottles are just one of the I Spy Games you can play. Hanna got the I Spy Eagle Eye board game for Christmas this year. She loves it, and I love it. It’s actually the first game she’s had where I don’t want to poke my eyes out when she insists I play with her.
There is also multiple I Spy card games. I picked up a couple I Spy computer games at a garage sale. I think they’re a little hard for my 4 year old still, but she still tries. And of course there’s a ton of I Spy Books. We got a bunch through Scholastic this year. They were really small and easy, but a perfect practice for the bigger more in depth I Spy books that are available.
You can of course play regular old I Spy in the car. 🙂 The I Spy games are a great way to get your kiddo learning and observing. They’ll be having so much fun they’ll never notice they might be learning new skills in the process.
If you put together an I Spy Bottle let me know! I’d love to see yours.







I LOVE the I Spy Bottle you made!!!
What a brilliant and fun activity. I’ve got to save a few bottles!
Thanks for sharing this one!
Your I Spy bottle looks like a lot of fun! We made an I Spy zen garden using dyed rice (because my kids refused to put any toys in! Here’s the link to that post:
http://mamasmiles.com/?p=1215
For some odd reason, I spy bottles have never been popular in my house..
But i love your ocean themed one. Where did you get the tiny bits to put inside? the little startfish and stuff… 🙂
I got them at Michaels craft store. They are actually beads… but they worked great for this. The letters were actually like pendants and had a little tube a the top for a string to go through, but we just broke those off.